
Mastering Resto-Mod Upgrade Techniques for Classic Cars
When it comes to classic cars, the magic lies in their timeless design and nostalgic charm. But what if we could blend that vintage allure with modern performance and safety? That’s exactly what resto-mod upgrade techniques are all about. Over the years, I’ve dived deep into this fascinating world, and today, I’m excited to share some of the best practices and insights to help you master these techniques. Whether you’re looking to boost horsepower, improve handling, or simply make your classic ride more reliable, this guide will steer you in the right direction.
Understanding Resto-Mod Upgrade Techniques
Resto-mod, short for restoration and modification, is a unique approach that respects the original aesthetics of a classic car while integrating contemporary technology. The goal? To create a vehicle that looks vintage but drives like a modern machine. This means upgrading everything from the engine and suspension to the brakes and interior, without compromising the car’s iconic style.
Here’s a quick rundown of the key areas where resto-mod upgrade techniques shine:
Engine swaps and upgrades: Installing modern engines that offer better fuel efficiency and power.
Suspension enhancements: Using coilovers, independent rear suspensions, or adjustable shocks for improved ride quality.
Brake system improvements: Upgrading to disc brakes with modern calipers for safer stopping power.
Electrical system modernization: Adding new wiring harnesses, LED lighting, and advanced gauges.
Interior comfort and safety: Incorporating modern seats, seat belts, and infotainment systems.
By focusing on these areas, you can transform your classic car into a reliable, high-performance machine that’s a joy to drive every day.
Essential Resto-Mod Upgrade Techniques for Performance and Safety
Let’s get into the nitty-gritty of some essential resto-mod upgrade techniques that can truly elevate your classic car’s performance and safety. I always recommend starting with the fundamentals before moving on to more complex modifications.
Engine and Drivetrain
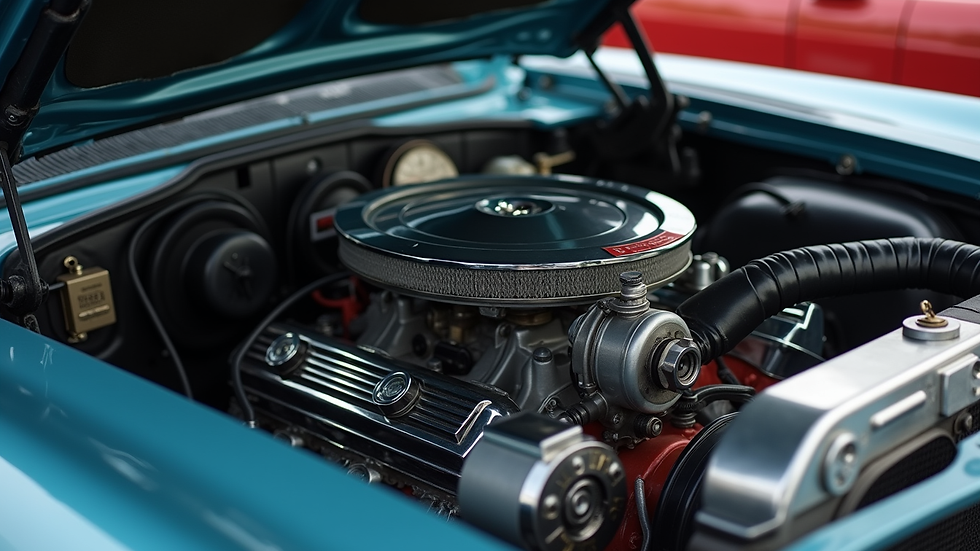
Swapping out an old carbureted engine for a modern fuel-injected V8 or even a crate engine can drastically improve power and reliability. Fuel injection systems provide better throttle response and fuel economy, which is a huge plus for daily driving. Don’t forget to upgrade the transmission to a modern automatic or manual gearbox that can handle the increased power and provide smoother shifts.
Suspension and Handling
Classic cars often have outdated suspension setups that can feel floaty or unpredictable on today’s roads. Upgrading to a fully independent suspension or installing adjustable coilovers can make a world of difference. These upgrades improve cornering, reduce body roll, and enhance overall ride comfort. Plus, modern bushings and sway bars add precision to your steering feel.
Braking Systems
One of the most critical safety upgrades is replacing drum brakes with disc brakes. Modern disc brakes offer better heat dissipation and stopping power, which is essential when you’ve increased your car’s performance. Consider upgrading to four-wheel disc brakes with high-performance calipers and rotors for the best results.
Electrical and Lighting
Old wiring can be a nightmare, so rewiring your classic car with a modern harness is a smart move. This not only improves reliability but also allows you to add features like LED headlights, daytime running lights, and digital gauges. These upgrades enhance visibility and give your car a subtle modern touch without ruining its classic vibe.
Interior and Comfort
While the exterior and mechanical upgrades are crucial, don’t overlook the interior. Modern seats with better support, three-point seat belts, and updated sound systems can make your driving experience much more enjoyable. You can keep the original look by choosing retro-style upholstery and gauges that blend old-school charm with new technology.

Choosing the Right Parts and Materials
One of the biggest challenges in resto-mod projects is selecting the right parts and materials. It’s tempting to go for the cheapest options, but quality matters when you want your car to perform well and last long. Here are some tips to help you make smart choices:
Research thoroughly: Look for parts specifically designed for your car model or compatible resto-mod upgrades.
Prioritise quality over cost: High-quality components might cost more upfront but save you headaches and repairs later.
Consult experts: Don’t hesitate to reach out to specialists like oldbonesfabrications andover who have experience in high-end classic car restorations.
Use OEM or OEM-style parts when possible: This helps maintain the car’s authenticity while improving performance.
Consider custom fabrication: Sometimes, bespoke parts are the best way to achieve perfect fitment and function.
By investing time and effort into sourcing the right parts, you’ll ensure your resto-mod project is both reliable and impressive.
Step-by-Step Guide to a Successful Resto-Mod Project
Now, let’s break down the resto-mod upgrade process into manageable steps. This approach keeps things organised and helps avoid common pitfalls.
Step 1: Planning and Budgeting
Start by defining your goals. Do you want a show car, a daily driver, or a track-ready machine? Your answer will guide your choices. Set a realistic budget that includes parts, labour, and unexpected expenses.
Step 2: Disassembly and Assessment
Strip your car down to the bare essentials and inspect every component. Identify what can be restored, what needs upgrading, and what should be replaced. This is also the time to check for rust or structural issues.
Step 3: Chassis and Suspension Work
Address any chassis repairs first. Then, install your upgraded suspension components. This foundation work is crucial for handling and safety.
Step 4: Engine and Drivetrain Installation
Fit your new engine and transmission. Make sure all mounts, linkages, and wiring are correctly installed. Test fit everything before finalising.
Step 5: Brake and Electrical Systems
Upgrade your brakes and rewire the car with a modern harness. Add lighting and gauges as planned.
Step 6: Interior and Finishing Touches
Install new seats, trim, and safety equipment. Finish with paint and detailing to bring your vision to life.
Step 7: Testing and Tuning
Take your car for a test drive and fine-tune the suspension, engine, and brakes. This step ensures everything works harmoniously.
Following these steps methodically will help you avoid costly mistakes and achieve a resto-mod that’s both stunning and functional.
Why Partnering with Specialists Makes a Difference
While DIY resto-mod projects can be rewarding, partnering with specialists can elevate your build to a whole new level. Experts bring years of experience, access to rare parts, and advanced fabrication skills that are hard to match. For instance, working with a company like oldbonesfabrications andover means you’re tapping into a wealth of knowledge and craftsmanship dedicated to pushing the boundaries of classic car restoration.
They can help with:
Custom chassis modifications
Precision engine swaps
Bespoke suspension setups
High-quality paint and finish work
This collaboration ensures your resto-mod project not only meets but exceeds your expectations, resulting in a vehicle that turns heads and performs flawlessly.
Embracing the Future of Classic Cars
Resto-mod upgrade techniques are more than just mechanical tweaks - they represent a philosophy of respecting the past while embracing the future. By combining classic design with modern technology, we create cars that are safer, faster, and more enjoyable to drive. Whether you’re upgrading a beloved family heirloom or a weekend cruiser, these techniques open up endless possibilities.
Remember, the journey is just as exciting as the destination. Take your time, enjoy the process, and don’t be afraid to experiment. With the right approach and a bit of passion, your classic car can become a masterpiece of innovation and nostalgia.
Happy wrenching!


Comments